Introducing the Linguana CLI: a translated app in one command
The Linguana CLI scaffolds a blog, SaaS page, or storefront in five frameworks, already in four languages. Then it links the app to your project from the terminal.
$ npx @linguanahq/cli create app my-blog◇Choose a template│Elsewhere — Blog◇Choose a framework│SolidJS◇Package manager│npm◇Connect Linguana or try a demo?│Try the demo◇Create your app◇Install dependencies└Your app is ready. cd my-blog npm run dev$
Key takeaways
The Linguana CLI (@linguanahq/cli 0.1.0, MIT) creates a complete multilingual app with npx @linguanahq/cli create app.
Fifteen templates are available: a blog, a SaaS page, and a storefront, each in React, Vue, Svelte, SolidJS, and TanStack Start.
Demo mode ships English, French, Spanish, and Arabic, needs no account, and makes no Linguana API requests.
When you are ready, login, link, and env pull connect the app to a project, and doctor checks the setup. Linking never starts paid translation.
Every command works non-interactively with --yes and --json, so the CLI runs in CI and from AI coding agents.
Today we are releasing the Linguana CLI. One command creates a complete app (a blog, a SaaS landing page, or a storefront) in your framework, already translated into four languages. When you want your own translations, the same CLI signs you in, links the app to a Linguana project, and checks the setup.
Terminal
$ npx @linguanahq/cli create app my-blog
The package is @linguanahq/cli 0.1.0, released under the MIT license. It needs Node.js 22.12 or later, or Bun, and works with npm, pnpm, Yarn, and Bun projects.
A 24-second tour: create an app, switch between four languages, then log in, link, and run doctor. Account and project values are samples.
Most localization tools start after you have built something: you add an i18n library, invent keys, move your copy into JSON files, and wire up a sync. Linguana already removes most of that. Its build-time compiler finds the text in your components, so there are no keys and no locale files to maintain. You can read more about that approach on the product page.
The CLI removes the remaining step: the blank project. Instead of reading a setup guide and hoping your config is right, you start from an app where everything is already connected, and then make it yours.
There are three templates, and each one is a finished app rather than a skeleton:
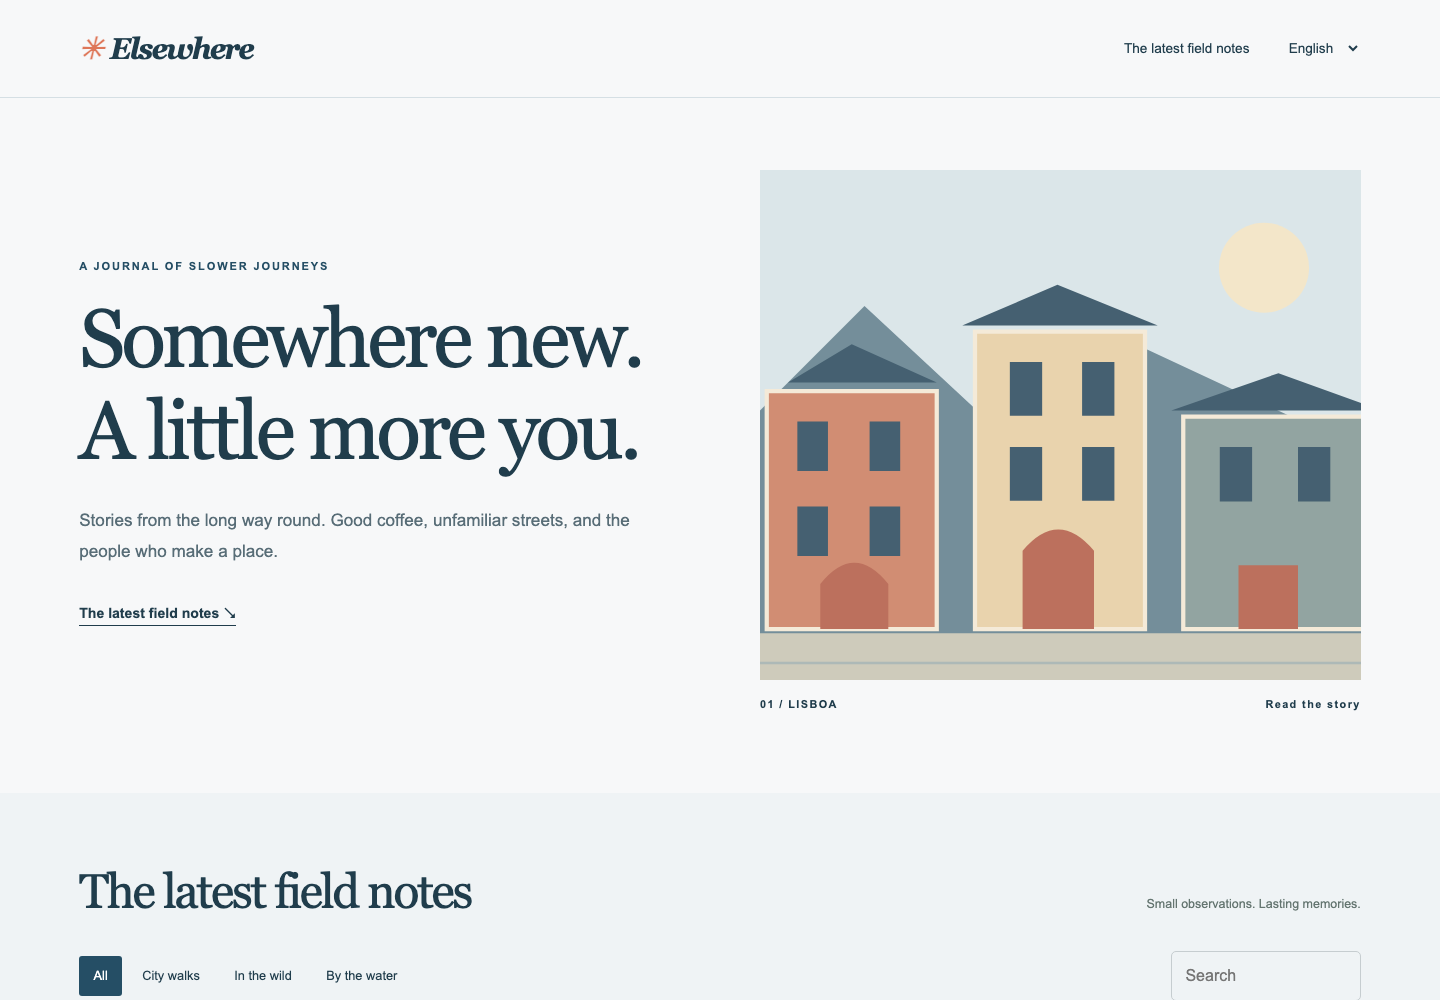
Elsewhere, a blog: six complete articles, search and categories, and localized dates.
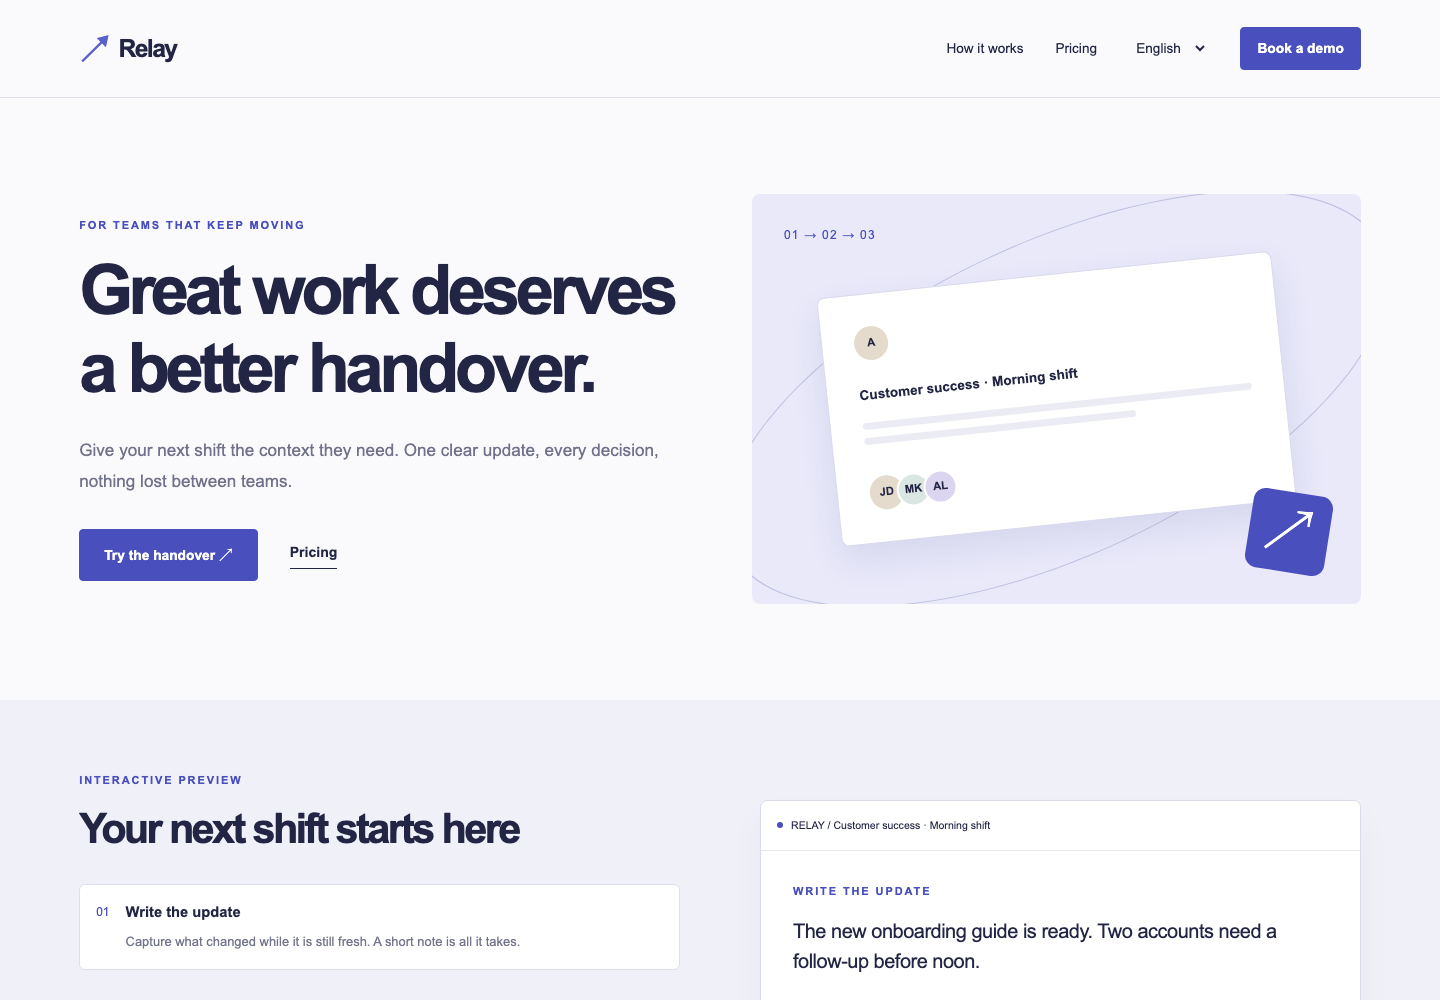
Relay, a SaaS landing page: an interactive product preview, monthly and annual pricing, and accessible demo forms.
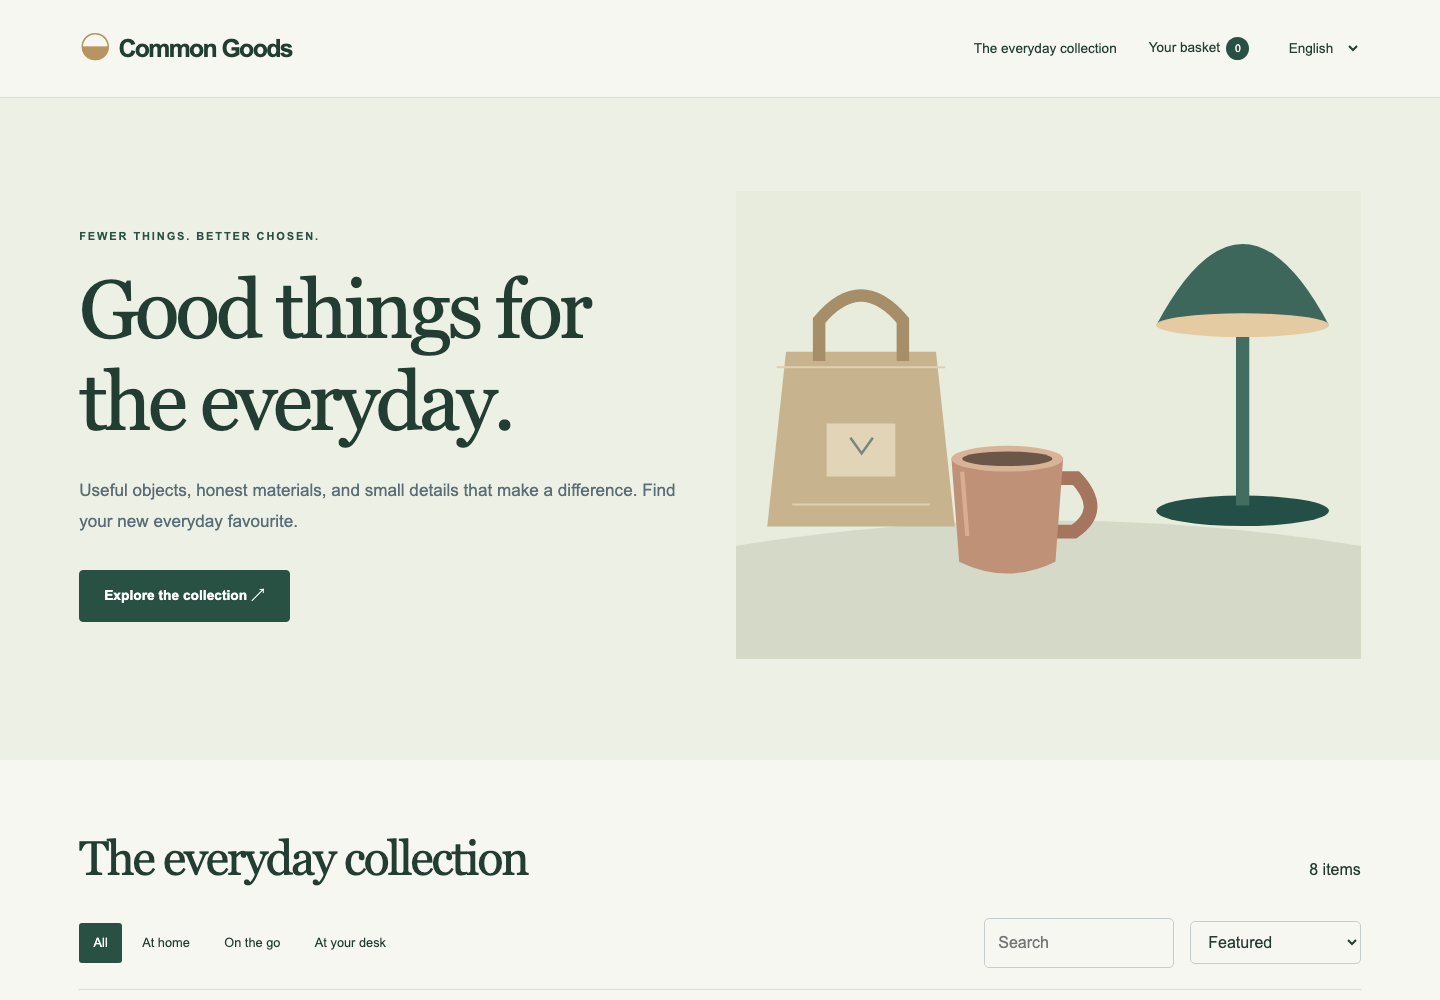
Common Goods, a storefront: eight original products, search, sort, and filters, and a persistent shopping cart.
Every template is available in React, Vue, Svelte, SolidJS, and TanStack Start: fifteen apps in total. You can browse them, with screenshots, in the template gallery.
The templates are frontends. Demo forms send nothing and the storefront's checkout takes no payments. CMS services, customer accounts, and real payments are yours to add.
In demo mode, each app ships with English, French, Spanish, and Arabic. Switching to Arabic flips the layout to right-to-left, so you can see how your design holds up in both directions before you write any code.
my-blog — localhost:5173Sample
Elsewhere
Stories worth slowing down for
Six journeys, told carefully.
Demo mode switches between bundled translations. Text shown is sample content.
Demo mode needs no account and makes no requests to Linguana. It is the quickest way to see what a multilingual app built with Linguana looks like.
When you want to translate your own copy, three commands connect the app to a project.
login opens your browser and shows a short code. Confirm it matches, approve the request, and the terminal is signed in. Codes expire after ten minutes. On a remote machine, login --no-browser prints the address instead.
link connects the app to an organization and project, creating them if you need to, and writes the project's credentials to an ignored .env.local file.
env pull refreshes those credentials later, for development, staging, or production.
Terminal
$ npx @linguanahq/cli login$ npx @linguanahq/cli link
The CLI is careful with credentials. Your session is stored outside the project, separately for each API origin. Build tokens go only into an ignored environment file and never get a browser prefix, and the CLI refuses to write to tracked environment files. logout revokes the CLI session without signing your browser out.
doctor checks everything the app needs to build with Linguana: the SDK packages, the build configuration, your CLI session, the environment file, and the project token. Each check either passes or tells you what to fix.
Terminal
$ npx @linguanahq/cli doctor
doctor supports Vite and TanStack Start apps today. whoami, orgs list, and projects list show which account, organizations, and projects the CLI can see.
Every prompt has a flag, and the CLI never waits for input when it is not attached to a terminal. Add --yes to accept defaults and --json for machine-readable output:
That makes the CLI a good fit for AI coding agents like Claude Code, Cursor, Codex, and Copilot. An agent can scaffold a template, run doctor, and read the JSON result without guessing at prompts. The AI agent setup guide has a copy-paste prompt for adding Linguana to an existing app.
Run npx @linguanahq/cli create app and pick a template.
Start the dev server and switch languages in the app.
When you are ready for your own translations, run login and link.
The CLI documentation covers every command and flag, and the CLI page has the full command reference. The changelog lists everything else we have shipped.
Frequently asked questions
Do I need a Linguana account to try the CLI?+
No. npx @linguanahq/cli create app with demo mode uses bundled English, French, Spanish, and Arabic translations, needs no account, and makes no requests to Linguana. You only sign in when you want to connect the app to a project.
Which frameworks do the templates support?+
React, Vue, Svelte, SolidJS, and TanStack Start. Each of the three templates (a blog, a SaaS landing page, and a storefront) is available in all five, for fifteen apps in total. There is no Next.js template yet.
Does linking an app start paid translation?+
No. Creating or linking an app never starts paid translation and never publishes a catalog. Translation runs start when someone on your team chooses to start one, after seeing the estimated cost.
What do I need to run the CLI?+
Node.js 22.12 or later, or Bun. The CLI works in projects that use npm, pnpm, Yarn, or Bun.
Can I use the Linguana CLI in CI or with an AI coding agent?+
Yes. The CLI runs without prompts when it is not attached to a terminal, or when you pass --yes or --json. With --json it prints machine-readable results, and every option that a prompt asks for is also available as a flag.
Linguana vs Lingo.dev: both translate apps without keys. Compare framework support, review and releases, model choice, file formats, and pricing in detail.
Linguana vs Lokalise compared on translation keys, developer setup, review, releases, mobile support, and pricing, so you can pick the right tool for your team.
Linguana vs Crowdin compared on translation keys, Git sync, AI translation, releases, open-source support, and pricing. See which one fits how your team ships.
Every language, one build
Your app, finally speaking every language.
Bring your source code or hand a prompt to your AI coding agent. Your team decides what reaches users.
 Lingo.dev
 Lokalise
 Crowdin